Open ID Settings
Using these settings we can add Open ID configuration to allow logging into the FAIR Wizard instance via external identity provider. Here is a detailed description of the setup:
Go to https://portal.azure.com/.
Go to
App registrations.Click on
New registration.Fill in a name.
Select
Accounts in this organizational directory only (Single tenant).Keep
Redirect URIempty.Click on
Register.Copy and store
Directory (tenant) IDandApplication (client) ID.Click on
Managein the left menu →Certificates & Secrets.Click on
New client secret.Fill description, set
Expiresand note it somewhere, then click onAdd.Copy
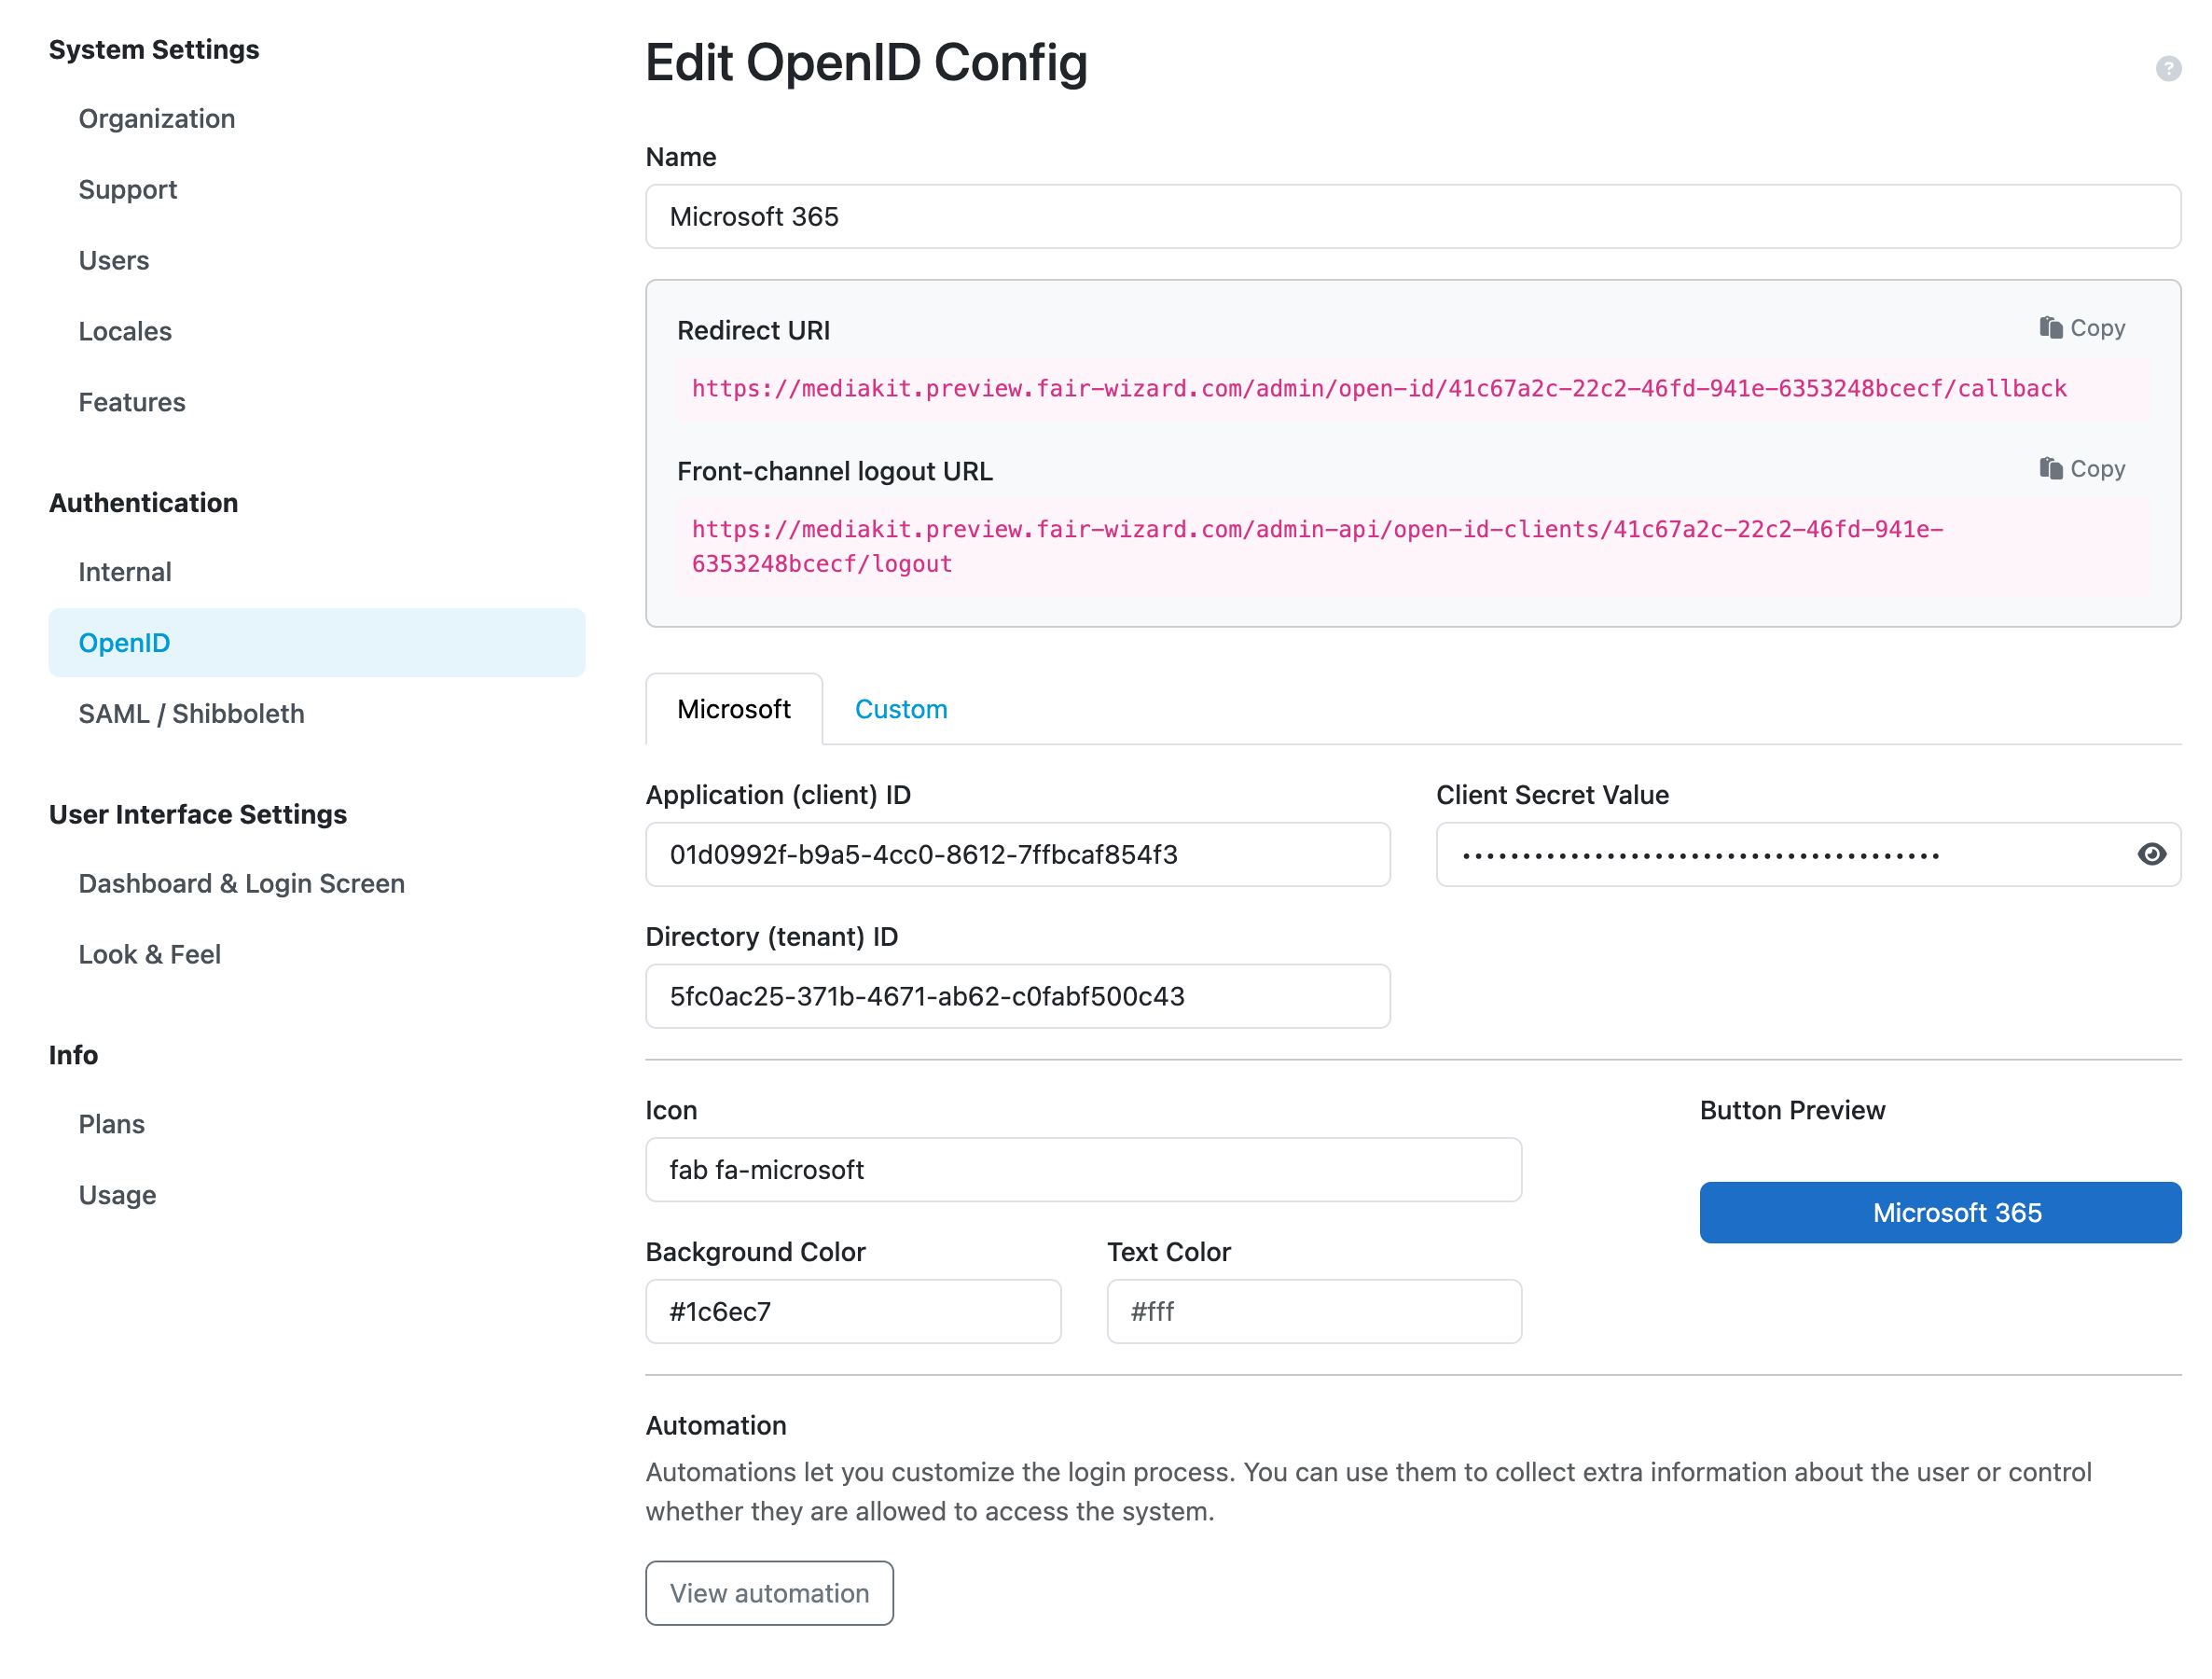
Valueand store it somewhere. You will not able to view it again.Go to OpenID in FAIR Wizard: Admin Center → Settings → Organization OpenID → Create.
- In Microsoft tab fill in :
Application (client) IDDirectory (tenant) IDClient Secret→<stored secret value>
(optional) fill Icon (
fab fa-microsoft, or some other from Font Awesome), Background Color and Text Color.Click on Save.
Go back to Microsoft Azure.
Click on
Managein the left menu →Authentication (Preview).Click on
Add Redirect URI.Click on
Web.Copy
Redirect URIandFront-channel logout URLfrom FAIR Wizard.Do not check any checkbox.
Click on
Configure.Click on
Managein the left menu →API permissions.Click on
Add a permission.Click on
Microsoft Graph→Delegated permissions.Under
OpenId permissionscheckemail,openidandprofile. UnderUserkeep checkedUser.Read.Click on
Add permissions.Click on
Managein the left menu →Token configuration.Click on
Add optional claim.Select
IDand checkemail,family_nameandgiven_name.Click on
Add.Test your openId in FAIR Wizard (You might need to refresh the login page for the login button to appear).
Example configuration of OpenID service.
Automations
We can use the Create automation button to add some extra steps after users use this login option. There are two tabs. Configuration, where we can set up automation using the Integration SDK and Logs where we can see logs of the automation. The automation can have its name changed and it can be enabled or disabled. See details in Automations.
Note
There can be only one automation per login configuration. However, multiple actions can be set up within a single automation script.